Saturday, 18 July 2015
How To Root Any Android Device
 |
| Picture of Android Logo |
What is Rooting?
Android rooting is the process of allowing users of smartphones, tablets, and other devices running the Android mobile operating system to attain privileged control (known as "root access") within Android's subsystem.Rooting is often performed with the goal of overcoming limitations that carriers and hardware manufacturers put on some devices, resulting in the ability to alter or replace system applications and settings, run specialized apps that require administrator-level permissions, or perform other operations that are otherwise inaccessible to a normal Android user. On Android, rooting can also facilitate the complete removal and replacement of the device's operating system, usually with a more recent release of its current operating system. Most of the time,rooting a device voids its warranty. More at Wikipedia.
Different company phones have different process' of rooting.Today I will show you how to root any android phone or tablet with single software.
SuperOneClick
1) Download The SuperOneClick Root tool and Extract it on your Desktop.
2) Connect your Android device to your Pc. (Make sure you have your Device Drivers Installed)
3) Click on "SuperOneClick" Application in the Folder.
4) A window appears like this-
 |
| Sample picture showing superoneclick interface |
6) Click on the "ROOT" Option.
7)Wait for the Process to get Completed.
8)You have successfully rooted your android device
Before you perform this you need to turn on USB debugging from developer options and allow installation from unknown resources.
NOTE: Do this at your OWN RISK! I am not responsible for any damage caused to your smartphone.
This software might not work on all smartphones.
Wednesday, 15 July 2015
Internet Download Manager (IDM) Latest Version Full Including Crack With Key

Key Features:
- Supports proxy servers, ftp and http protocols, firewalls, redirects, cookies, authorization, MP3 audio and MPEG video content processing.
- Integrates seamlessly into Microsoft Internet Explorer, Netscape, MSN Explorer, AOL, Opera, Mozilla, Mozilla Firefox, Mozilla Firebird, Avant Browser, MyIE2, and all other popular browsers to automatically handle your downloads.
- Can be used from command line.
- Can dial your modem at the set time, download the files you want, then hang up or even shut down your computer when it's done.
- Multilingual support.
- Zip preview.
- Download categories.
- Scheduler pro.
- Sounds on different events.
- HTTPS support.
- Queue processor.
- Enhanced virus protection on download completion.
- Built-in download accelerator.
Download Link:
Instructions For Installation:
1) Download Internet Download Manager(IDM) from the above download link.
2) If you have any previous version installed on your pc, uninstall it and restart the pc.
3) Now install the setup in the downloaded files.
4) Now close the Internet Download Manager and close it from the tray too.
5) Now open the crack folder and copy the contents of the crack to the default installation directory.
6) Now run Internet Download Manager and if the software prompts for serial key enter the serial key given in the downloaded files.
Tuesday, 14 July 2015
How To Speed Up Dial-Up Connections

Using Open DNS Server
What is DNS Server?
Domain Name System (DNS) is the name resolution protocol for TCP/IP networks, such as the Internet. Client computers query a DNS server to resolve memorable, alphanumeric DNS names to the IP addresses that computers use to communicate with each other.
How to Use Open DNS?
1) Press Windows + R to open Run.
2) Type ncpa.cpl and press enter to open network connections.

3) Right click on the connection you use and then select properties. In my case it is Reliance netconnect-Hi speed.
4) In properties select Networking tab and in that select properties.

5) And in that properties enter the following values in
Preferred DNS server: 208.67.222.222
Alternate DNS server: 208.67.220.220
Preferred DNS server: 208.67.222.222
Alternate DNS server: 208.67.220.220
6) After changing these values click ok and reconnect your modem.
7) Then to check whether you are successfully using Open DNS server click here.
8) If everything went well and If you are using Open DNS then it shows success message
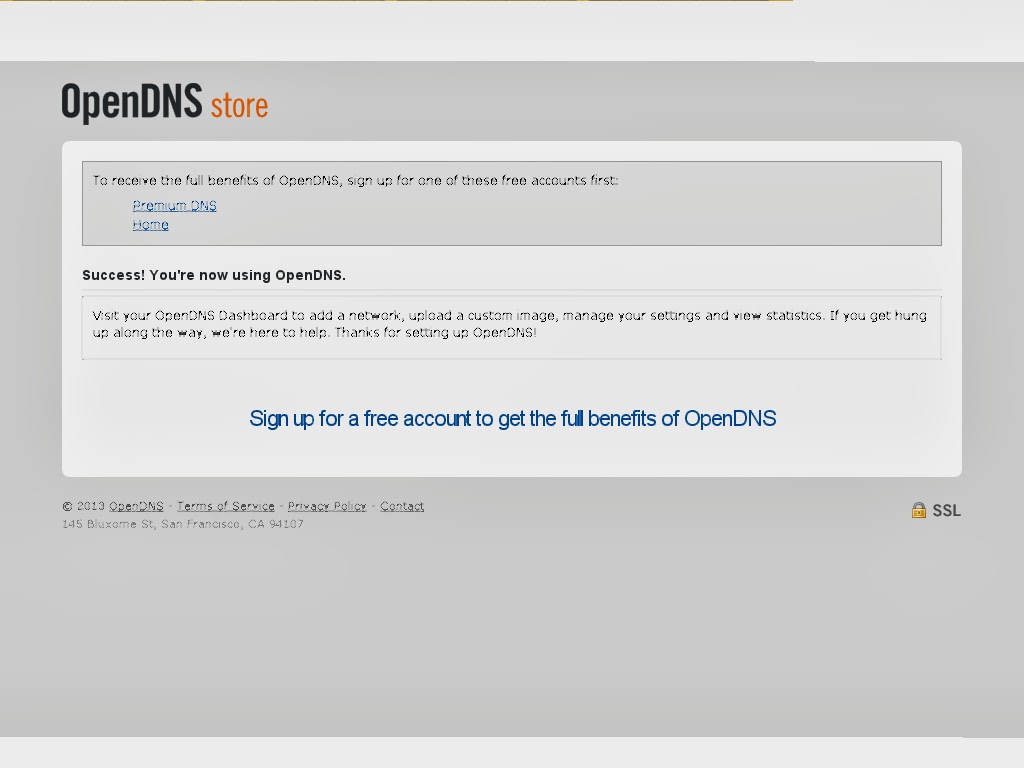
Note: For Reliance modem users you need to change settings in reliance netconnet software i.e; the software that installs automatically when you connect your modem to pc.

9)The Best DNS values can change from time to time so to get the best DNS server just download this simple software called DNSBench.
10) After downloading this software install it and it opens.
11) Now click Nameservers tab. Now the software loads list of available DNS servers it takes approx. 15 seconds.

12) Now click Run Benchmark. Now the software analyzes each DNS server and makes a list. In the list the first one is the best and fast DNS server so note the corresponding values and repeat the steps 1,2,3,4 and 5 with these values.

13) Remember that after changing the values disconnect the network and connect again. You will find noticeable change in the browsing speed after starting DNS server.
If you find this post useful please share it
How to Play Sony PSP Games On Android Phone/Tablet Using PPSSPP Emulator [No ROOT Required]

Whenever I see Dragonball Z, Ben 10, Pokemon now and then on the internet, I recall my days when I used to spend hours of time playing them on my Sony PSP. Fortunately, now it is possible to play all those psp games on our Android phones using PPSSPP emulator. Moreover, it requires no ROOT. Yes, you heard it right. Let's get started with hacking easy!
How To Install and Use PPSSPP Emulator to Play PSP Games On Android:
1. Download PPSSPP Emulator from here and install it.

2. Now visit www.ppsspp.org and scroll down till you see Cube Test Program.

3. Download the ELF file and place it in your internal SdCard.
4. Now Open PPSSPP Emulator and select the ELF file which you have downloaded.
5. If you see a spinning cube like the below image, it means that your Android phone is capable of running PSP Games.

Now all you need to do is, search up for game ISO files, download them, place them on SdCard, open them in emulator and play!
How To Improve Gaming Performance?
Though your android phone/tablet is capable of running psp games, you often see lag during gameplay. To avoid this, use some ram boosters. Also, reduce the graphic quality in game setting.
like us on facebook
like us on facebook

Monday, 13 July 2015
PHOTO VERIFICATION TRICK WITH PROXY
How To Bypass photo verification 2015
 Photo verification on Facebook : Trick to bypass photo verification.No more photo Tag .Bypass photo verification and photo tag by this trick.Facebook is like a life for us and we can not loose our accounts so easily .if you are having issues with photo tag verification then its time to bypass it with Japanese proxy.When this trick gets blocked then do inform us so we can update the trick accordingly because we can not check proxy every time but hacking easy want its visitors to have fully working tricks.

Now follow the below simple steps to bypass photo verification with japanese proxy trick.Steps are made clear with pictures.If you find difficulty then ask for help.Do not miss any step otherwise you will be unable to bypass photo verification.
Open Firefox and set proxy and port( UPDATED STEP )

Bypass photo tag proxy : 106.186.125.220 Port 3128
If above proxy and port don't work then go to Proxynova.com and get a new Japanese proxy
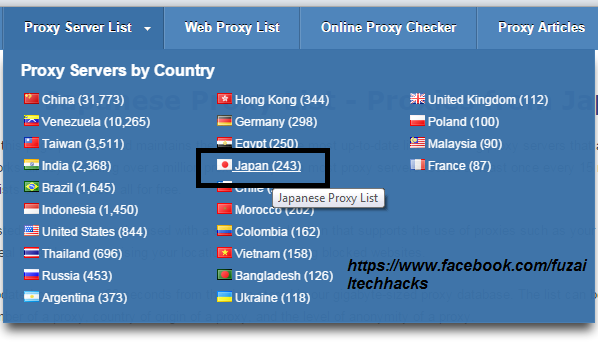
Now Open m.facebook.com "only open m.facebook otherwise it will not work"
Now Follow the below steps and enjoy


Now Follow the below steps and enjoy


DO NOT FORGET TO LIKE US FACEBOOK
Subscribe to:
Posts
(
Atom
)


